

Views: 0 Author: Site Editor Publish Time: 2026-07-14 Origin: Site


Terminating stranded wire demands mechanical precision. Using standard pliers to crush wire ferrules creates high-resistance joints. These compromised connections eventually cause terminal failure, dangerous arcing, or severe melting. Relying on the wrong crimper leaves uneven compression and voids inside the ferrule barrel. This mechanical flaw compromises electrical integrity across your entire installation. Engineers and technicians need reliable methods to secure conductors permanently.
This guide provides a strictly technical framework to help you choose the right tool. We match wire size limits to correct tool mechanisms and crimp profiles. You will learn to evaluate capacity, compare profile geometries, and ensure mechanical reliability. We cover applications ranging from fine electronics to large solar arrays. Following these guidelines ensures your connections remain gas-tight and vibration-resistant.
Tool capacity must strictly align with your most frequently used wire gauges; oversized tools will under-crimp small wires, failing the pull test.
Self-adjusting ratcheting mechanisms ensure a complete cycle, eliminating the risk of human error and under-crimping.
Crimp profile matters: Choose a hex ferrule crimping tool for round terminal blocks and a square profile for rectangular cage clamps.
High-current applications (like solar or inverters) require dedicated, heavy-duty tools capable of handling 10mm² or 16mm² cross-sections.
Selecting the correct tool begins by understanding wire measurements. North American industries rely on American Wire Gauge (AWG). International standards use cross-sectional area in square millimeters (mm²). You must map these values accurately to avoid terminal mismatch.
AWG operates on an inverse logarithmic scale. Smaller AWG numbers indicate thicker wires. Conversely, the metric system measures the physical area directly. You cannot guess these conversions. A 20 AWG wire corresponds to 0.5mm². An 8 AWG wire equals 10mm². Using incompatible tools damages both the wire strands and the equipment.
Standard Wire Conversion Chart |
||
AWG Size |
Metric Cross-Section (mm²) |
Common Application |
|---|---|---|
24 AWG |
0.25 mm² |
Micro-electronics, Sensors |
18 AWG |
1.0 mm² |
Control Panels, Relays |
10 AWG |
6.0 mm² |
Standard Power Runs |
8 AWG |
10.0 mm² |
Inverters, Heavy Motors |
6 AWG |
16.0 mm² |
Solar Arrays, Battery Banks |
Most standard tools handle a versatile range. They typically cover 23 AWG to 10 AWG (0.25 to 6.0mm²). This range suits everyday control panel wiring. However, heavy-duty power runs demand larger capacities.
You must upgrade to a specialized 10mm² ferrule crimper for 8 AWG cables. Forcing large wires into standard tools causes immediate damage. It ruins the die mechanism. It also compromises the structural integrity of the ferrule wall. If you work on thicker main power lines, you need tools built specifically for heavy gauges.
Always verify the certified capacity limits of your tool. Compare these limits against the exact outer diameter (OD) specifications provided by wire manufacturers. Stranding types heavily influence the actual outer diameter. High-strand-count silicone wire feels thicker than standard THHN wire of the same gauge. Account for these variables before you execute a crimp.
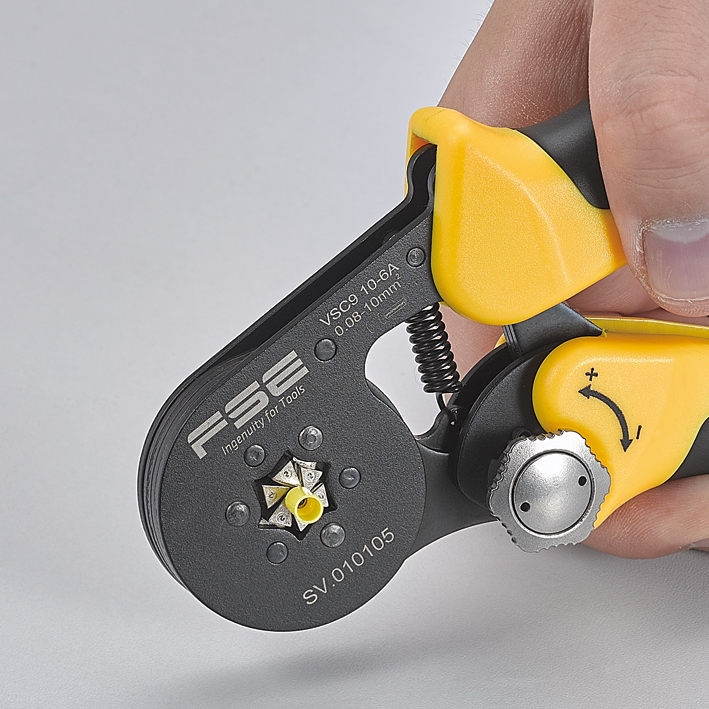
The die geometry dictates the final shape of the ferrule. This shape determines how well the wire fits into the terminal block. You must match the crimp profile to the receptacle geometry.
A square die creates a box-like profile. It features flat surfaces and distinct ridged corners. This shape maximizes the contact area on flat planes.
Square crimps perform best in standard rectangular terminal blocks. They are highly effective in spring-loaded cage clamps. The flat sides align perfectly against the clamping mechanisms. This alignment ensures maximum current transfer. It also resists vibration pull-outs effectively.
A six-sided die compresses the ferrule from six equal directions. This action creates a nearly round, highly compact profile. The ridges are smoother and less pronounced.
You should choose a hex ferrule crimping tool for round terminal inserts. They are essential for tightly spaced circuit board blocks. The circular shape prevents sharp corners from snagging during insertion. It ensures the wire seats fully into deep, cylindrical receptacles without friction.
Match the tool’s die shape directly to the terminal block geometry. Do not evaluate wire size alone. A perfect gauge match will still fail if a square profile jams inside a round hole. Review the terminal manufacturer data sheet. Identify the clamping style before you select your profile geometry.
Best Practice: Use square profiles for elevator clamps and tension spring terminals.
Best Practice: Use hex profiles for cylindrical screw terminals and high-density PCB headers.
Common Mistake: Forcing a square crimp into a round hole strips the protective plating off the ferrule.
The mechanical action of the tool dictates workflow speed and operational lifespan. You must choose between dynamic adaptation and static precision.
Self-adjusting models feature a dynamic die mechanism. They automatically adapt to the inserted wire size. This adaptation happens strictly within their rated range.
Using end sleeve crimping pliers accelerates your workflow. They shine when building mixed-size control panels. They deliver highly consistent pressure distribution around the entire barrel. You do not need to pause and align the wire into a specific slot.
However, these tools contain complex internal springs. These springs can wear out after thousands of repetitive cycles. They are also less ideal for extremely large gauges. Compressing 16mm² wire requires immense force. Self-adjusting heads often lack the massive handle leverage needed for those extreme applications.
Fixed cavity tools feature multiple pre-sized slots along the jaw. You must place the ferrule exactly into the corresponding cavity. The die dimensions never change.
These tools contain zero moving sizing parts. This simplicity makes them incredibly durable. They provide high precision for standardized assembly lines. If you crimp the identical wire size hundreds of times daily, fixed dies offer unmatched longevity.
Both styles must include a forced-lock ratcheting mechanism. The ratchet strictly guarantees a full compression cycle. It prevents the jaws from opening until the die bottoms out completely. This feature eliminates human error. It prevents technicians from applying partial pressure. A reliable ratchet fulfills strict industry compliance standards, including UL and DIN 46228 guidelines.
Real-world applications demand specific tool capabilities. Environmental stress, vibration, and current load dictate your sizing requirements.
Custom 3D printers and micro-controllers operate on thin wires. You will typically work with 24 AWG to 18 AWG sizes. These printer mainboards experience constant mechanical vibration during operation.
Standard tinned wire ends will quickly break or vibrate loose. You must use ferrules to secure them. Tools for these applications must feature high-tolerance, tight-closure dies. Loose crimps in electronics lead to micro-arcing. Micro-arcing melts terminal blocks and destroys expensive motherboards.
Renewable energy systems handle massive DC currents. You will encounter large cross-sections connecting battery banks to inverters. These connections endure extreme thermal cycling and high mechanical stress.
Never rely on soldered tips for high-current cables. Solder suffers from cold flow. It slowly creeps and deforms under screw pressure, creating loose, dangerous joints. Instead, a dedicated 16mm² ferrule crimper is strictly required. It securely terminates battery cables without solder. It compresses thick copper stranding into a solid, gas-tight block capable of safely carrying heavy inverter loads.
Not all crimpers deliver professional results. You must evaluate the physical construction of the tool before purchasing. Poor materials lead to weak connections.
Material Science: Look specifically for hardened or tempered carbon steel dies. Avoid tools featuring cast zinc alloys in the crimping head. Zinc deforms under high pressure, leading to sloppy, oversized crimps.
Calibration and Tension Adjustment: Professional tools feature a manual tension wheel. This star-wheel allows you to recalibrate the crimping pressure. You can tighten the mechanism to compensate for normal die wear over time.
Ergonomics and Leverage: Panel building involves highly repetitive motions. Evaluate the handle length and the toggle lever mechanisms. High mechanical advantage is strictly required. You must be able to compress thick copper stranding using minimal hand force to prevent joint fatigue.
Verification: A reliable tool must produce a crimp that survives rigorous testing. The connection must pass a standard pull-out force test. It should never strip the ferrule sleeve or snap the internal copper strands.
Investing in a high-quality ferrule crimping tool ensures long-term safety. Inspect the die closure under a light source. The jaws should meet flush without visible gaps.
Choosing the right tool requires matching physical mechanics to your exact wire specifications. You must identify your most dominant wire sizes first. Do not buy a large-capacity tool if you only work on micro-electronics. Next, check your terminal block geometry. This step dictates whether you need a hex or square die profile.
Always invest in a robust ratcheting mechanism. The ratchet enforces a complete cycle and guarantees a gas-tight seal. Finally, remember the actual stakes involved. The cost of premium hand tools is entirely negligible. It pales in comparison to the cost of troubleshooting an electrical fire or replacing expensive equipment destroyed by a single loose connection.
A: No. Standard pliers crush the ferrule flat, leaving gaps between wire strands and the ferrule wall. This improper crushing increases electrical resistance. It compromises the structural integrity and highly risks wire pull-out under tension.
A: No, the metal sleeve dimensions remain standardized across both types according to DIN 46228 specifications. The tool exclusively compresses the metal barrel portion. It does not crush or alter the plastic insulation collar.
A: Always match the ferrule to the wire gauge precisely first. If you are using a fixed tool, place it in the cavity matching the ferrule's exact rated gauge. Never downsize a ferrule to fit an improper tool, as it will cut wire strands.


