
- All
- Product Name
- Product Keyword
- Product Model
- Product Summary
- Product Description
- Multi Field Search
Please Choose Your Language

Views: 0 Author: Site Editor Publish Time: 2026-10-16 Origin: Site


If you have spent any time wiring a high-density control panel, you know the frustration. You carefully strip a stranded wire, only to watch the delicate copper threads fan out, bend, and snap as you tighten the terminal block screw. Dealing with frayed wires that refuse to sit securely is a daily headache for anyone building electrical enclosures.
This is more than just an annoyance. Bare stranded connections hide serious operational risks. When strands separate, the connection becomes loose. This creates a prime environment for electrical arcing, rapid oxidation, and increased resistance. Eventually, this localized heat buildup transforms into a severe fire hazard right inside your control box.
The professional fix for this mechanical flaw is ferrule crimping. You bundle those fragile strands into a solid, highly conductive tip. This completely eliminates the dangers of bare terminations. This guide will walk you through the exact process of wire end sealing. We will cover material selection, tool specifications, and how to execute the perfect crimp to ensure flawless electrical work.
Safety First: Proper ferrule application stops wire fraying, drops electrical resistance, and practically eliminates short circuits in terminal blocks.
Tool Matters: Utilizing a dedicated ratcheting tool is mandatory. Standard workshop pliers will ruin the connection.
Size Matching: Aligning the exact wire gauge to the sleeve size is the critical step for a pull-resistant crimp.
Profile Types: Square and hexagonal crimp profiles serve different mechanical purposes depending on your terminal block architecture.
Testing: Visual inspections and standard pull tests guarantee the long-term safety of your electrical panels.
The electrical engineering landscape is shifting rapidly toward standardized, vibration-resistant terminations. Automated control systems, renewable energy inverters, and high-density Programmable Logic Controllers simply cannot tolerate connection failures. Regulatory bodies and industrial standards now heavily push for ferrule usage to mitigate thermal runaway.
Modern switchgear is moving aggressively toward push-in terminal block technology. These push-in blocks demand the absolute rigidity that only a crimped ferrule provides. Proper wire capping is no longer just a luxury. It is a strict baseline requirement for surviving high-vibration and fluctuating thermal environments.
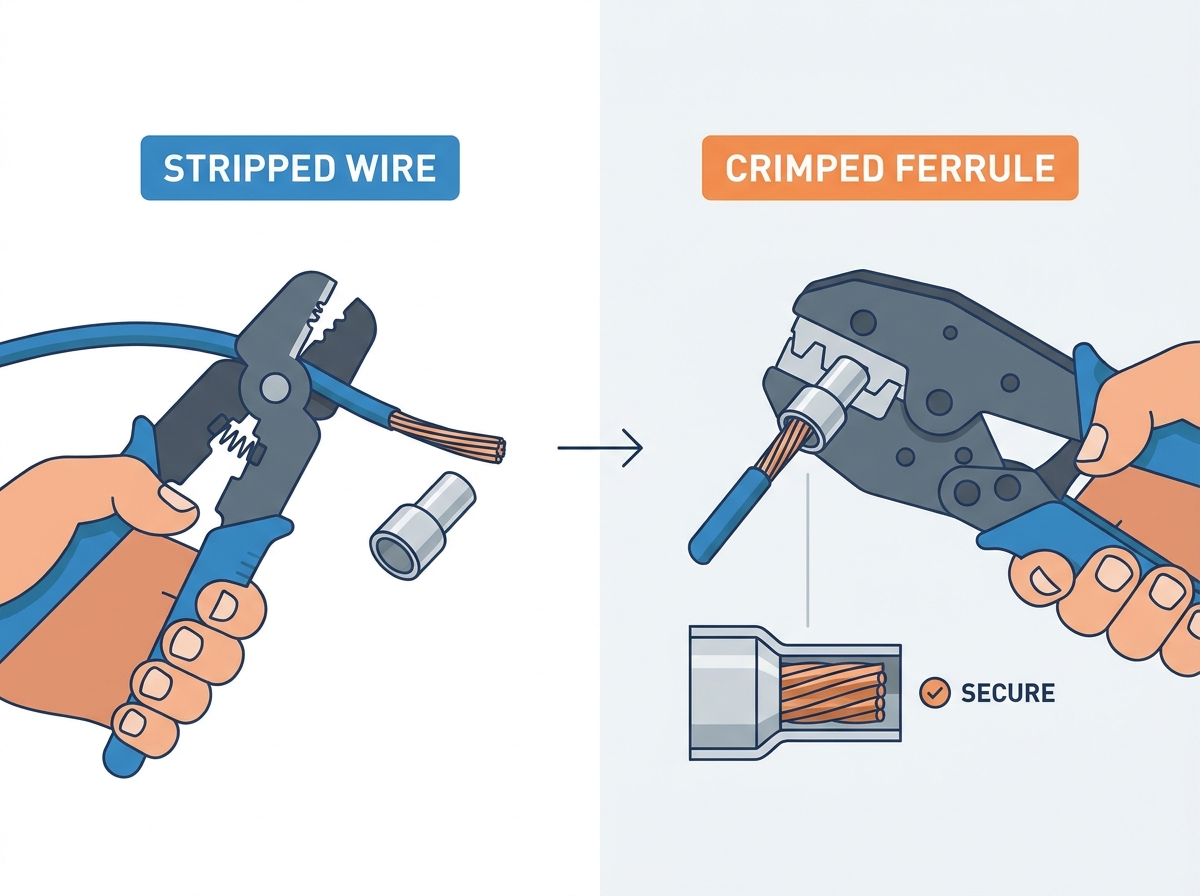
A wire ferrule is a highly conductive, tin-plated copper tube. It slides over the stripped end of a stranded wire. Most feature a flared, color-coded plastic collar at one end. This collar guides the fine strands into the tube and provides mechanical strain relief. You use a specialized instrument to compress this metal tube tightly around the copper. The metal permanently deforms, creating one solid wire end.
Traditional screw terminals crush bare wires. The rotational force splays and flattens the delicate strands. This mechanical shearing severs individual threads, instantly dropping your current-carrying capacity. Exposed copper also oxidizes quickly, degrading the contact quality over time.
A proper ferrule encapsulates everything. It shields the copper from crushing damage and locks out ambient oxygen. Corrosion never gets a chance to start.
Resistance kills electrical systems. Ferrule crimping forces a loose bundle of strands into a dense mass of copper. This guarantees near-complete surface area contact inside the terminal block. Eliminating microscopic air gaps keeps electrical resistance incredibly low. Lower resistance means less heat, keeping your panels safe under heavy loads.
Do not grab the cheapest components you can find. Incompatible materials will compromise your entire panel. You need industrial-grade tolerances for a secure connection.
Insulated ferrules feature a flared plastic sleeve. This sleeve acts as crucial strain relief. It stops the wire insulation from bending sharply and snapping at the termination point. Use these for industrial machinery and high-vibration control panels.
Uninsulated ferrules are just the tin-plated metal tube. They are built for extreme space constraints. When tightly packed terminal blocks leave no room for plastic collars, these are your go-to solution.
Matching the tube to your exact wire cross-section is non-negotiable. If the tube is too large, wires pull out. Too small, and strands break. Always follow the DIN 46228 color-coding standard. For example, a 20 AWG wire pairs with a white collar. A 14 AWG wire takes a blue collar. Verify these codes against your specific project specs.
High-purity electrolytic copper is mandatory for maximum conductivity. Electro-tin plating acts as a sacrificial barrier against rust. Cheap brass alternatives will fracture under pressure. Sourcing from a reliable ferrule crimper manufacturer ensures you get metallurgical precision that meets strict safety codes.
Your hands cannot apply perfectly even pressure. You need specialized mechanical instruments. Bypassing these tools guarantees a non-compliant connection.
A flawless crimp demands a flawless strip. Precision strippers remove polymer insulation without scoring the copper underneath. Losing strands during stripping lowers the current rating and leaves air gaps.
A dedicated crimper has a built-in ratcheting mechanism. This is a critical safety feature. The jaws will not release until the tool applies the exact required compression force. This eliminates human error. Professional tools, like those engineered by FSE-tools, handle wire ranges from AWG 28 up to AWG 5 with absolute consistency.
Profile Type | Compression Style | Best Terminal Block Match | Key Advantage |
|---|---|---|---|
Square Crimp | Four-sided compression | Standard rectangular screw terminals, elevator clamps | Creates serrated ridges for excellent grip in flat cages. |
Hexagonal Crimp | Six-sided compression | Round spring-clamp terminals, modern push-in blocks | Forms a uniform, rounded shape for fast push-in installation. |
Follow this strict methodology for a professional result.
Precision is everything here. Strip the insulation so the exposed copper perfectly matches the metal barrel length. If the tube is 8mm, strip exactly 8mm. Over-stripping leaves live copper exposed. Under-stripping ruins your conductivity.
Slide the smoothly stripped wire into the plastic collar. You can twist the strands slightly to keep them together, but do not over-twist. Over-twisting expands the bundle diameter. Push until the insulation hits the inside of the collar. The copper strands should sit flush with the open end of the metal tube.
Open your ratcheting crimper. Place the metal barrel into the correct sizing die. Make sure the plastic collar rests outside the jaws. Never crimp the plastic insulation. It will shatter and destroy the strain relief.
Squeeze the handles firmly and steadily. Keep applying pressure until the ratchet releases automatically. A perfect result shows uniform, deep indentations along the metal barrel. The plastic collar remains intact, and zero loose strands escape the base.
Now that your wire is capped securely, you need to install it correctly.
For traditional screw terminals, slide the square-crimped tip fully into the metal cage before tightening. If you are wiring modern push-in blocks, grab a hex-crimped ferrule. Push the rigid tip straight into the spring-loaded aperture until the retaining clip clicks. The rigidity makes stranded wire act like solid core wire.
Crimped tips are strong, but they are not indestructible. Always follow the manufacturer torque specs. Cranking down too hard with a screwdriver will crush the metal, fracture the copper, and ruin your gas-tight seal.
Even seasoned techs make errors. Avoid these to keep your systems online.
Oversized ferrules are a common trap. The tool bottoms out early, leaving the wire loose. Undersized tubes force strands to fold backward outside the collar, creating an immediate short-circuit hazard.
Over-stripping leaves energized copper exposed outside the terminal. Under-stripping forces the tool to compress wire insulation inside the metal tube. This spikes electrical resistance and causes localized melting.
Never use needle-nose pliers or generic automotive crimpers. They just flatten the tube. A two-sided pinch leaves massive air gaps. Wires pull out easily, and oxidation sets in fast. You must use specialized electrical crimping equipment to achieve multi-sided compression.
Do not energize any circuit without verifying your mechanical bond.
Grip the crimped ferrule with one hand and the insulated wire with the other. Give it a firm, steady tug. It should feel like a single piece of solid metal. If you feel any slipping, cut it off and start over.
Check for stray strands poking out the back of the collar. Look at the front opening to ensure copper tips are flush. Finally, verify that the crimp indentations are symmetrical and run the full length of the barrel.
Proper ferrule crimping separates amateur wiring from professional electrical engineering. Stopping wire fraying and dropping electrical resistance prevents thermal hazards and short circuits. It adds a few seconds to your wiring routine, but the long-term reliability is undeniable.
Match your sizes accurately. Test your connections. Before you tackle your next control panel or switchgear upgrade, ensure you have the right gear. Upgrade to professional ferrule crimping tools to guarantee your electrical systems remain secure, compliant, and safe for years to come.
No. Regular pliers will simply flatten the ferrule, leaving internal gaps where wires can shift and pull out. A dedicated crimping tool applies even, calibrated pressure from multiple sides simultaneously, creating a secure, gas-tight connection that meets strict electrical safety standards.
Absolutely not. Soldering stranded wire before crimping is highly discouraged by electrical codes. Solder cold flows under mechanical pressure over time. The solder will slowly deform, causing the connection inside the terminal block to become loose, which creates high resistance and a serious fire hazard.
A square crimp compresses the ferrule from four sides, creating a block-like shape that fits perfectly into standard rectangular screw terminals. A hex crimp compresses from six sides, creating a rounder, more uniform shape. Hex crimps are generally better suited for round spring-clamp or push-in terminal blocks where a circular profile ensures optimal contact.
No. Once a ferrule has been crimped, the metal tube is permanently deformed to grip the copper wire tightly. If you need to change the connection or make an adjustment, you must cut the wire below the ferrule, strip the insulation again, and apply a brand-new ferrule.
Ferrules are strictly sized according to the wire gauge or metric cross-section. You should always match the ferrule size exactly to your specific wire size. Most insulated ferrules follow a standard color-coding system, like the DIN standard, to help you easily visually identify the correct size for your wire.
No. The plastic collar is designed purely for strain relief and to guide the stranded wires into the metal tube. Crimping the plastic will shatter it, ruining the strain relief and potentially exposing bare wire. The crimping tool jaws should only compress the uninsulated metal barrel.
While the National Electrical Code does not explicitly mandate ferrules for every stranded wire connection, it does require that equipment be installed according to the manufacturer instructions. Many modern terminal block and PLC manufacturers strictly specify the use of ferrules. Additionally, UL 508A standards for industrial control panels heavily favor ferrule usage to ensure safe, reliable terminations.


