
- All
- Product Name
- Product Keyword
- Product Model
- Product Summary
- Product Description
- Multi Field Search
Please Choose Your Language

Views: 0 Author: Site Editor Publish Time: 2026-10-08 Origin: Site


Veteran electricians and seasoned contractors know the intense frustration of dealing with metal-shielded wiring. You start a seemingly simple wiring project. Suddenly, without the correct approach, you find yourself staring at ruined hand tools, nicked internal wires, and dangerously jagged metal edges. Improper cuts go far beyond a mere aesthetic issue. They act as a primary catalyst for dangerous short circuits, hidden electrical fires, and severe physical injuries from razor-sharp steel burrs.
Fortunately, bypassing these hazards is entirely possible. Using a specialized cutting tool prevents these catastrophic mistakes, ensuring a clean, safe, and professional termination every single time. Throughout this comprehensive guide, we will break down the nuances of handling metal-shielded electrical wire from an engineering perspective. We will explore the exact tools required, walk through a foolproof step-by-step cutting technique, evaluate acceptable manual alternatives, and dive into advanced methods for managing heavy-duty commercial cables.
The electrical construction sector is currently experiencing a massive shift toward modular building techniques. Contractors are increasingly relying on pre-fabricated Metal-Clad cables to drastically reduce on-site installation times. However, this demand for speed brings a strict zero-tolerance policy for damaged conductors.
Industry data shows that electrical faults caused by improper cable termination account for a significant portion of post-construction rework and safety audit failures. Consequently, project managers are actively moving away from brute-force manual tools. They are mandating precision cutting devices and professional electrical wire management tools to ensure flawless, code-compliant installations on the first attempt. This evolution highlights a critical reality. Investing in the right tools is no longer a luxury, but a fundamental requirement for risk mitigation.
Using a dedicated rotary-style cutter remains the safest, most efficient method for slicing through metal-shielded electrical wire without compromising the delicate internal conductors.
Always ensure the power is completely isolated at the breaker and verified with a reliable non-contact voltage tester before attempting any physical cuts.
While a fine-toothed hacksaw can serve as a viable alternative in a pinch, it demands precise angling and a highly delicate touch to avoid slicing the internal wire insulation.
Installing an anti-short bushing, often referred to in the trade as a red devil, after cutting is an absolute non-negotiable step required by electrical codes to protect the wire from sharp metal edges.
Proper wire management and the utilization of a reliable cable tie tensioning tool are essential for the final installation, ensuring your cut cables remain permanently secure and intact over time.
Armored cable is a specialized category of electrical wiring engineered specifically for environments where standard non-metallic NM cable would be highly vulnerable to physical trauma. The defining characteristic of this cable is its interlocking metal jacket. This jacket is typically constructed from heavily galvanized steel or lightweight aluminum. This spiral-wound armor acts as a robust physical barrier against crushing forces, accidental impacts, and rodent damage. It stands as the standard choice for commercial buildings, industrial facilities, and exposed residential basements.
Historically, the term BX was widely used as a trademark for early armored cables. Today, the modern industry standard is Metal-Clad MC cable or Armored Cable AC. While they appear nearly identical from the exterior, their internal grounding mechanisms differ significantly. AC cable relies on the metal jacket itself, paired with a thin internal bonding strip, to serve as the equipment grounding conductor. In contrast, modern MC cable includes a dedicated, insulated green ground wire alongside the hot and neutral conductors, establishing a much safer and more reliable grounding path.
Ironically, the very design that makes armored cable so protective also makes it notoriously difficult to penetrate. The interlocking spiral metal is specifically engineered to resist shearing and crushing. When inexperienced individuals attempt to muscle their way through this cable without the proper knowledge or tools, they expose themselves and the surrounding structure to severe risks.
The foremost danger of improper cutting involves slicing through the protective metal jacket and accidentally nicking the plastic insulation of the copper wires inside. Even a microscopic gouge in the THHN insulation severely compromises the dielectric integrity of the wire. When power is eventually restored, the exposed copper can arc against the grounded metal jacket. This instantly creates a severe fire hazard or a dangerous ground fault. Furthermore, improper cutting methods inevitably leave jagged, razor-sharp metal burrs on the edge of the jacket. These burrs will slowly saw into the wires over time due to natural building vibrations or thermal expansion.
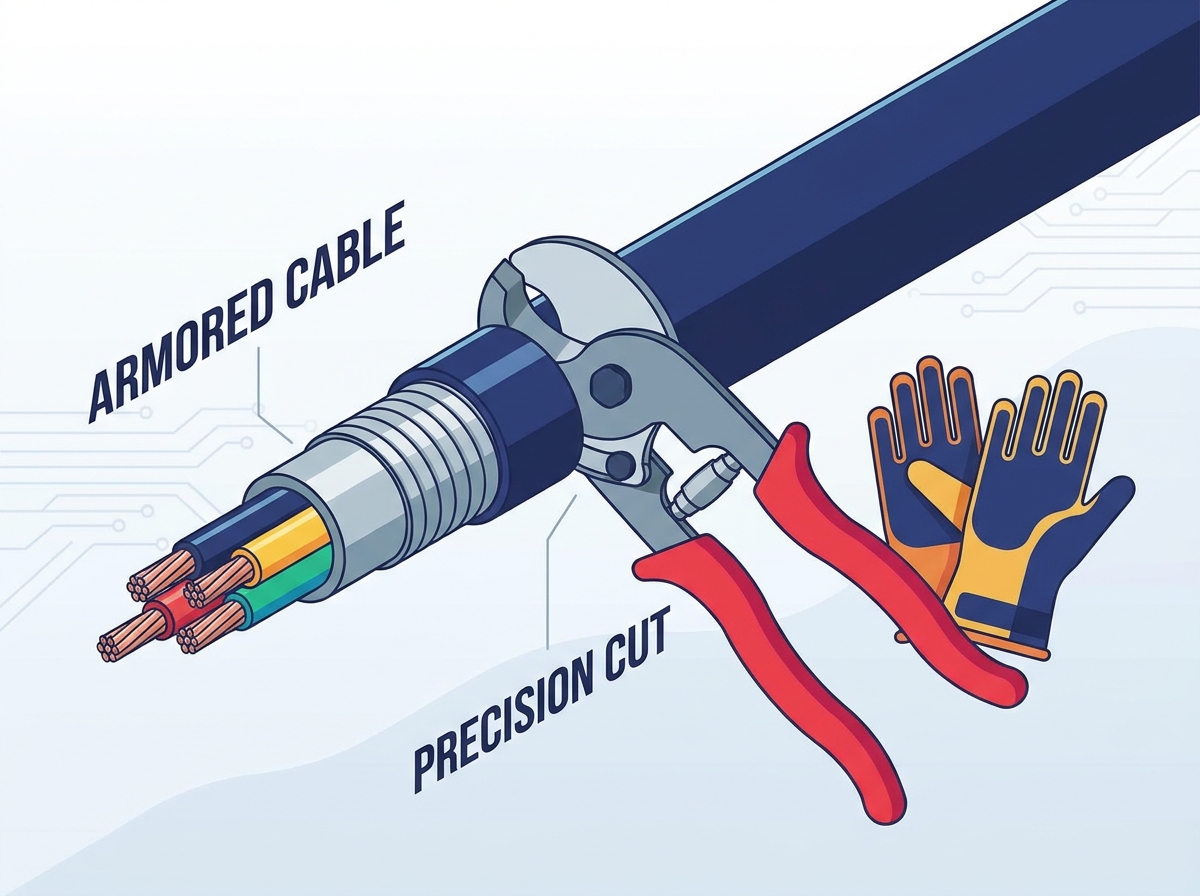
To truly understand the value of dedicated equipment, we must evaluate how different tools interact with the helical armor. Below is a professional breakdown of common cutting methods utilized in the field.
Tool Type | Safety Level | Cut Quality | Risk of Wire Damage | Professional Verdict |
|---|---|---|---|---|
Rotary Cable Cutter | Very High | Clean, blunt edge | Near Zero | The absolute industry standard for safety and speed. |
Fine-Tooth Hacksaw | Moderate | Often jagged | High | Acceptable backup method requiring high manual dexterity. |
Diagonal Pliers or Snips | Very Low | Crushed and deformed | Extreme | Strictly prohibited. Destroys the cable profile and insulation. |
For professional electricians and serious contractors alike, the rotary cutter is the undisputed champion for this specific task. These specialized devices are brilliantly engineered to execute one job flawlessly. They score the interlocking metal jacket without ever coming into contact with the fragile internal conductors.
A standard rotary cutter features a sturdy clamping mechanism that grips the cable securely within a grooved V-channel. Once clamped tight, the user turns a hand-crank attached to a hardened steel circular blade. The depth penetration of this blade is precisely calibrated. Instead of blindly sawing entirely through the cable, the blade scores a clean, shallow line across the peak of a single metal spiral. Utilizing a dedicated cutter guarantees a uniform, factory-quality cut every single time, drastically reducing the margin for error.
Many beginners make the critical, often costly error of attempting to sever metal-shielded wire using standard diagonal cutting pliers, heavy bolt cutters, or aviation snips. These tools operate strictly on a crushing mechanism. When applied to armored cable, they aggressively crush the interlocking metal jacket inward, flattening it violently against the internal wires. This action obliterates the wire insulation. It also deforms the metal jacket so severely that it becomes physically impossible to install proper junction box connectors or protective bushings.
In contrast, the hacksaw is a viable, albeit distinctly inferior, alternative to a rotary cutter. A fine-toothed hacksaw can be carefully employed to saw through the armor. However, this method relies entirely on the user's manual dexterity, patience, and visual judgment. It is incredibly easy to push the saw just a millimeter too deep and ruin the conductors.
Before any tool even brushes against the cable, strict electrical safety protocols must be observed. Never assume a wire is dead, even if you are the one who personally flipped the breaker switch. Implementing standard Lockout Tagout protocols is a vital habit. This is particularly true when navigating complex commercial environments where multiple trades operate simultaneously and someone else might accidentally restore the power.
Always utilize a high-quality, non-contact voltage tester to double-check the line. Run the tester along the exterior of the cable jacket and at any exposed junction points. If the tool beeps or flashes red, halt your work immediately. Only proceed when you have empirical, undeniable confirmation that the circuit is entirely de-energized.
Cutting metal inherently produces physical hazards, making Personal Protective Equipment mandatory. First, equip yourself with heavy-duty leather work gloves. The freshly sheared edges of steel or aluminum armor are razor-sharp. They can easily inflict deep, painful lacerations on unprotected hands. Second, always don safety goggles. The mechanical snapping process of the metal jacket can occasionally launch microscopic metal shavings or jagged burrs into the air, posing a significant risk to your vision.
Accuracy lays the foundation for a safe installation. Begin by determining exactly how much of the internal wire you need exposed to comfortably make your connections inside the electrical junction box. The National Electrical Code generally dictates a minimum of 6 inches of free conductor, measured from the point in the box where it emerges from its raceway or cable sheath. For most standard applications, stripping back 6 to 8 inches of the metal jacket provides ample room for safe, uncrowded splicing. Use a permanent marker to draw a clear, visible line on the metal jacket where the cut needs to occur.
Take your rotary cutter and fully open the clamping jaw. Place the flexible cable into the V-shaped channel of the tool, ensuring it rests flat. Align your permanent marker line directly beneath the circular cutting blade. Once perfectly aligned, firmly tighten the set screw or thumb knob. The cable must be completely immobilized. If it twists, sags, or slides during the cutting process, the blade will skip across the ridges, resulting in a jagged, uneven score line that is difficult to snap.
With the cable securely locked in place, apply gentle downward pressure on the cutting blade while simultaneously turning the hand crank. The objective here is not to saw through the cable entirely. You merely want to score the peak of the metal spiral. Depending on whether the cable is soft aluminum or rigid steel, this typically requires only one to three full rotations of the crank. You will feel a distinct, slight click or a sudden drop in resistance once the blade successfully breaches the outer ridge of the armor. Stop cranking immediately upon feeling this release.
Loosen the thumb screw and extract the cable from the tool. Grasp the cable firmly with both gloved hands, positioning your thumbs directly on either side of the fresh score line. Bend the cable sharply at the cut. You should hear a satisfying, distinct snap as the scored metal breaks cleanly apart. Once the armor separates, slightly untwist the short end of the jacket, following the natural direction of the spiral, and gently slide it off the internal wires. Gently peel back any protective paper to inspect the vibrant THHN insulation underneath. If you spot any exposed copper or compromised plastic, you must cut the wire further back and restart the process.
If you find yourself without access to a rotary cutter, a hacksaw equipped with a bi-metal blade with a minimum of 32 teeth per inch serves as the only professionally acceptable alternative. The absolute secret to success with a hacksaw lies in the angle of the approach. Do not attempt to cut straight down perpendicularly across the cable. Instead, hold the blade at a precise 45-degree angle, aligning it parallel to the spiral ridges of the armor. You want the teeth to glide across the peak of a single ridge.
The golden rule of using a hacksaw on armored cable is universally agreed upon in the engineering community. Do not cut all the way through. Apply incredibly light pressure and utilize slow, highly controlled strokes. Watch the deepening groove closely. As soon as you break through the outer metal shell and catch a glimpse of the internal protective paper wrapping or the colored plastic wire insulation, cease sawing immediately.
Once the metal is adequately scored, employ the same bend and snap technique described earlier to fracture the jacket. Because a manual hacksaw cut is rarely as pristine as a rotary tool cut, you will likely be left with a sharp, protruding tail of metal. Take a pair of sharp diagonal cutting pliers known as dikes and carefully snip this tail off. Manipulate the edge to be as flush and blunt as physically possible to prevent future wire damage.
While residential electrical projects typically involve manageable 14-gauge or 12-gauge wires, commercial and industrial applications frequently utilize much larger armored cables. Dealing with heavy-duty feeder cables presents a unique set of physical hurdles. The interlocking metal armor on these industrial cables is significantly thicker, stubbornly inflexible, and much heavier than standard residential wiring.
The sheer weight and stiffness of thick armored cables require strategic handling techniques. Before making any cut, it is crucial to secure the cable firmly. A heavy, unsecured cable can violently whip or twist while you are turning the crank of your rotary cutter, leading to jagged edges, broken blades, and ruined cuts. Professionals frequently use a portable pipe vise or a heavy-duty clamping workbench to hold large armored cables completely stationary.
To safely and efficiently process large-gauge metal-shielded wire, professionals must upgrade their hardware. Standard rotary cutters are generally rated for cable diameters up to half an inch. For anything exceeding that, you must utilize a heavy-duty rotary cutter specifically engineered with an expanded clamping mechanism and a larger, more robust cutting wheel. These specialized commercial cutters operate on the exact same rotary principle but offer the necessary mechanical leverage required to penetrate thicker steel or aluminum jackets.
Successfully scoring and snapping the metal jacket is merely the first phase of the installation process. The most critical safety step occurs immediately after the armor is removed. You must insert the anti-short bushing. Known in the electrical trade as a red devil due to its bright red plastic construction, the anti-short bushing is a small, split-sleeve insulator designed to slide snugly between the internal conductors and the freshly cut edge of the metal armor.
According to the National Electrical Code, anti-short bushings are strictly required at all termination points for Type AC cable. Even when utilizing a premium rotary cutter, the resulting metal edge remains sharp enough to eventually slice through plastic wire insulation. Over years of service, buildings experience subtle vibrations from HVAC systems, foot traffic, and the natural hum of alternating current. Without an anti-short bushing acting as a buffer, these micro-vibrations will inevitably cause the sharp metal edge to saw through the wire insulation. To install the bushing, simply spread the split plastic sleeve, wrap it around the exposed wires, and slide it deep into the metal armor until the red collar sits flush against the cut edge.
Once the anti-short bushing is securely anchored in place, the cable must be properly routed, connected, and supported. Proper cable management is strictly regulated by building codes, mandating that armored cable must be supported at specific intervals along the structural framing. When routing multiple cables along joists or organizing them within commercial cable trays, maintaining neat, secure bundles is essential for both safety and aesthetics.
Industrial zip ties are frequently utilized for this task. However, pulling them tight by hand often results in insufficient tension and leaves a sharp, jagged plastic tail. For bundling large groups of cables or securing heavy-duty flexible conduits flawlessly, utilizing a dedicated flush-cut cable tie tensioning tool is highly recommended. High-end models feature a durable high-carbon steel cutting blade, adjustable tension dials that accommodate everything from delicate sensor wires to heavy electrical bundles, and an ergonomic pistol grip. This specialized device ensures a tight, secure hold and automatically cuts the tie perfectly flat against the head. This eliminates sharp plastic edges that routinely scratch installers' hands or damage adjacent wire jackets.
While armored cable is purposely designed to be exceptionally tough and resistant to external damage, the process of preparing it for installation is straightforward and entirely safe when you employ the correct engineering techniques. Relying on a dedicated rotary cutter eliminates the frustrating guesswork, fiercely protects the delicate internal conductors, and ensures your electrical connections remain secure for decades to come.
Always remember to verify that the power is thoroughly disconnected, wear your heavy-duty protective gear, and absolutely never skip the installation of the anti-short bushing. By investing in professional-grade cutting equipment and upgrading to superior wire management solutions from the FSE Tools catalog, you save valuable time, comfortably avoid costly code violations, and prevent dangerous electrical faults from threatening your facility.
No. Using bolt cutters, diagonal pliers, or standard tin snips is highly dangerous and largely ineffective. These traditional tools apply blunt crushing force rather than a precise cutting action. When you attempt to snip armored cable, you crush the interlocking helical coils inwards. This deformation severely pinches the internal copper conductors and destroys the plastic insulation. Furthermore, a crushed metal jacket cannot accept an anti-short bushing or fit cleanly into a standard junction box connector.
Yes, the vast majority of high-quality rotary cutters are engineered to handle both materials with ease. Modern Type MC cable is frequently manufactured with a lightweight aluminum jacket, which is relatively soft and extremely easy to score. Older BX cables and certain heavy-duty commercial cables feature thick galvanized steel jackets. High-end cutters utilize hardened, high-carbon steel cutting wheels that can effortlessly score both metals, though cutting steel will naturally dull the blade slightly faster.
Visual inspection is your primary, most crucial line of defense. After you snap the armor and slide the metal jacket off, you must carefully and thoroughly examine the exposed plastic insulation covering the wires. Look closely for any deep gouges, localized scratches, or glints of exposed bare copper. If you discover even a microscopic nick in the insulation, you must cut that entire section of wire off and start the process over from scratch. Nicked insulation creates a high-risk environment for electrical arcing.
Using a reciprocating saw is strongly discouraged for standard residential and commercial MC cable preparation. The violent, high-speed reciprocating action offers zero depth control, making it almost guaranteed that you will slice entirely through the metal jacket and instantly destroy the internal wire insulation. Reciprocating saws should only be used during demolition phases where the cable is completely disconnected and marked for disposal.
Failing to install an anti-short bushing is a direct violation of the National Electrical Code for AC cable installations. Without this protective plastic buffer, the sharp, freshly cut metal edge of the armor rests directly against the wire insulation. Over time, natural building vibrations and thermal expansion will cause the metal edge to saw through the plastic. This inevitably leads to an exposed copper wire touching the grounded metal jacket, resulting in a dangerous short circuit or electrical fire.
Blade longevity depends entirely on the frequency of use and the specific type of metal being cut. For a typical DIY homeowner or weekend hobbyist, a single hardened steel blade will likely last a lifetime. For a professional electrician working daily with steel-clad commercial cables, the blade may need replacement every few months. The primary symptom of a dull blade is the sudden need to apply excessive, uncomfortable pressure to the hand crank to achieve a viable score line.


