

Views: 0 Author: Site Editor Publish Time: 2026-08-09 Origin: Site


Upgrading to an automated stripping tool promises immense speed. You already know standard manual strippers waste valuable time during high-volume work. However, the current market is flooded with identical-looking options. They vary wildly in actual reliability. Choosing a poorly calibrated tool creates significant problems. It leads to severed copper strands and heavily damaged insulation. Ultimately, these hidden flaws will compromise your electrical connections. You need reliable performance, not marketing hype. This guide bypasses the industry fluff. We provide an objective, spec-driven framework. You will learn exactly how to evaluate and purchase the right tool. We cover requirements for specific workloads. You will see how tool designs match everything from sensitive PCB work to heavy household wiring. Read on to master the essential specifications.
Capacity dictates utility: A standard 0.08-6mm² wire stripper handles roughly 95% of household, automotive, and electronic DIY tasks.
Mechanism over multifunctionality: While a multifunctional wire stripper is convenient, the quality of the tension springs and cast jaws takes absolute priority.
Design dictates access: Choose side-entry (duckbill) models like the HS-D1 wire stripper for benchwork, and front-loading models like the FS-D3 wire stripper for tight spaces like junction boxes.
Adjustability is non-negotiable: True "self-adjusting" strippers still require a manual micro-tension knob to prevent scoring inner conductors on sensitive wires.
Every project demands efficiency. You must validate your need for an automated tool before purchasing one. A manual tool requires you to locate the exact wire gauge hole. You align the cable carefully. Then you twist and pull. This manual process takes several seconds per end. An automatic wire stripper reduces this to a single, fluid action. You simply insert the cable and squeeze the handles.
Repetitive batch work heavily relies on consistency. Automatic tools ensure highly uniform strip lengths every single time. This uniformity remains critical for reliable crimping. It also dictates success when installing push-in Wago connectors. You cannot afford uneven copper exposure inside modern terminal blocks. Automated jaws grab, slice, and remove the jacket in a synchronized motion. They eliminate the guesswork entirely.
However, you must acknowledge the physical trade-offs. Automated strippers are inherently bulkier than manual ones. They contain exposed springs and sliding rails. These moving parts remain susceptible to jamming in highly abrasive environments. You must weigh this bulk against the speed gained.
Performance Chart: Manual vs. Automatic Strippers |
||
Feature |
Manual Stripper |
Automatic Stripper |
|---|---|---|
Speed |
Slow (Multiple steps required) |
Fast (Insert and squeeze) |
Consistency |
Variable (Depends on user skill) |
High (Regulated by mechanical stops) |
Profile |
Slim (Fits easily in pockets) |
Bulky (Requires tool pouch space) |
Maintenance |
Zero maintenance needed |
Requires occasional dry lubrication |
You need a strict evaluation framework. Focus entirely on features that directly influence your project outcomes. Tool specifications often seem overwhelming. We will decode the essential metrics you must check.
First, evaluate the designated wire gauge range. The industry standard tool is a 0.08-6mm² wire stripper. This translates roughly to 28-10 AWG. It covers almost all automotive harnesses and household lines. Do not exceed this specified limit. Forcing an 8 AWG cable into standard jaws damages the internal mechanism. It stretches the recoil spring permanently. This stretching ruins the tool's ability to grab thinner electronics wires later.
Second, inspect the tension micro-adjustment knob. This small dial is absolutely critical. Different insulation materials react differently to blade pressure. Standard PVC jackets cut very easily. Conversely, tough PTFE or Teflon jackets resist slicing. The tension knob compensates for these varying thicknesses. You adjust it to slice the jacket cleanly without biting into the delicate copper core.
Finally, check for a built-in adjustable stopper. This guide ensures repeatable precision. Terminal blocks often require exactly 10mm or 12mm of exposed copper. The stopper lets you lock in this exact length. Follow these steps to evaluate a new tool:
Check the stamped gauge range on the metal jaws.
Test the micro-adjustment knob for smooth, rigid clicking.
Slide the length stopper back and forth to ensure it locks securely.
Perform three test strips on scrap wire to verify length consistency.
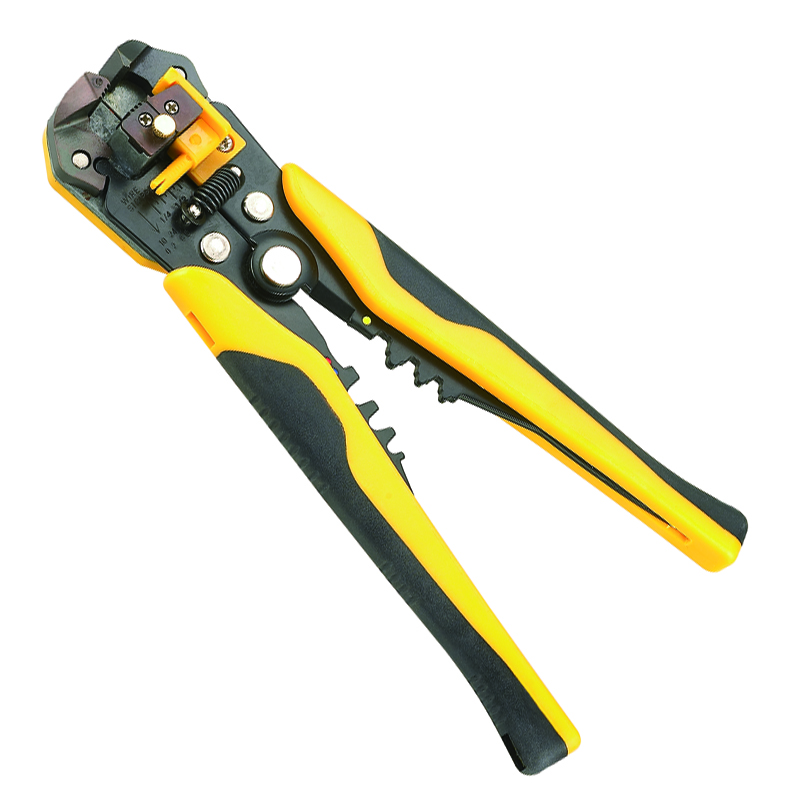
You will see countless combo tools on the market. We must apply a skeptical, experience-driven lens here. A multifunctional wire stripper offers distinct convenience. However, you must evaluate the secondary features carefully.
Assess the integrated wire cutters first. Look closely at the blade placement. A high-quality cutter sits directly below the main pivot point. This position provides maximum mechanical leverage. It allows you to snip thick cables effortlessly. Ensure the manufacturer uses high-carbon steel for these blades. Cheaper steel blades dull quickly and begin crushing cables instead of cutting them cleanly.
Next, evaluate the built-in crimpers. Most combo tools include slots for insulated and non-insulated terminals. Frame your expectations realistically here. These integrated crimpers work well for quick, low-stakes repairs. They handle basic automotive pinch-hitting. However, they rarely provide a certified, gas-tight seal. Professional installations still demand a dedicated ratcheting crimp tool. The combo handle simply cannot generate sufficient parallel force.
Your purchasing verdict should remain clear. Prioritize the quality of the primary stripping jaws above all else. Treat the integrated cutters and crimpers as secondary bonuses. They should never act as your primary purchasing drivers.
Best Practice: Always test integrated cutters on a scrap piece of solid copper. If the cutter leaves a flattened, jagged edge, the blade steel is inferior. A good tool leaves a perfectly round, flush cut.
Even the best tools have limitations. You must understand the realities of this category. We want to address common implementation flaws openly. This knowledge prevents ruined projects.
The "bite mark" issue ruins many electrical repairs. Cheap die-cast jaws tend to grip the cable too hard. When the jaws pull apart, they score the outer strands of finely stranded wire. They might even shear off several copper hairs. This reduces the current-carrying capacity of the connection. It creates a localized hot spot. You prevent this by investing in tools with precisely machined jaws.
Insulation compatibility presents another major hurdle. Highly flexible silicone jackets are popular in RC and hobby electronics. They bend beautifully but grip poorly. Slick Teflon jackets present similar challenges. These specialty materials sometimes slip completely inside self-adjusting jaws. The blades slide over the jacket without cutting it. You must calibrate the tension carefully to handle these advanced materials.
Finally, do not ignore routine maintenance. These tools live in dusty environments. Drywall dust and copper shavings accumulate quickly. Exposed springs and sliding tracks eventually stick. You must clean them occasionally. A quick blast of compressed air helps. Following up with dry graphite lubrication keeps the mechanism firing rapidly.
Skipping the tension adjustment when switching from solid to stranded wire.
Using oil-based lubricants on the tracks, which attracts heavy dirt.
Forcing the tool to strip thick, double-insulated Romex cable in a single pull.
Ignoring missing copper strands after completing a strip.
Tool architecture dictates where and how you can work. You must match the physical design to your daily environment. We generally divide these tools into two distinct categories.
The first category uses side-entry or duckbill jaws. A prime example is the HS-D1 wire stripper. These tools offer exceptional mechanical leverage. They usually include robust cutting and crimping features located lower on the handle. They excel in open workbench environments. They also handle automotive wiring beautifully. However, they require significant side clearance. You will find them incredibly frustrating to use inside deep, recessed electrical boxes.
The second category utilizes front-loading or pistol grip jaws. Consider the FS-D3 wire stripper as your baseline here. This design proves highly ergonomic for high-volume, repetitive work. The forward-facing jaws fit easily into tight spaces. You can reach into crowded server racks or deep wall boxes. The main drawback is leverage. Pistol grips generally lack the heavy-duty pulling force needed for very thick, multi-core cables.
Use the decision matrix below to finalize your selection. Match your primary workspace to the correct tool geometry.
Tool Architecture Decision Matrix |
||
Primary Work Environment |
Recommended Architecture |
Key Advantage |
|---|---|---|
Open Workbench / Electronics Repair |
Side-Entry (Duckbill) |
Maximum leverage and tool versatility |
Automotive Engine Bays |
Side-Entry (Duckbill) |
Easily handles thick battery cables and crimps |
Residential Wall Boxes / Switches |
Front-Loading (Pistol Grip) |
Fits perfectly into recessed gang boxes |
Telecom / Server Racks |
Front-Loading (Pistol Grip) |
Prevents wrist fatigue during batch processing |
The best stripping tool ultimately balances exact gauge capacity with precise tension control. You should prioritize versatile models that comfortably cover the standard 0.08-6mm² range. Remember that mechanical reliability always outperforms flashy, secondary features.
We highly recommend matching your tool geometry to your workspace. Direct your bench workers and automotive technicians toward heavy-duty, side-entry models. Conversely, outfit your field electricians with ergonomic, front-loading pistol grips for tight residential work.
Take action on these insights today. First, check your most frequently used wire gauges in your shop. Second, review supplier warranties to ensure long-term spring reliability. Finally, make your purchase confidently based on this spec-driven framework.
A: Yes, it can happen if configured poorly. Properly calibrated tension prevents the blades from reaching the core. However, an improper tension setup on extremely thin wire will easily sever delicate strands. Always test your settings on a scrap piece first.
A: Start with the knob at its loosest setting. Perform a test pull on scrap wire. If the jaws slip over the jacket, tighten the dial incrementally. Continue adjusting until the insulation breaks cleanly without leaving any score marks on the copper.
A: It depends on the design. Some wide-jaw duckbill models strip flat ribbon cables effectively. However, coaxial cables require specialized rotary strippers. Coaxial wire contains multi-layered shielding that standard parallel blades cannot process accurately.


